Is your Toyota Corolla due for an oil change? Considering doing it yourself? Great idea! Here's a step-by-step guide to help you through the process. Need to change the oil in your Toyota Corolla? Follow along for a simple walkthrough. Before starting, ensure you're working on a flat surface with good lighting. Having a well-stocked toolkit is essential, so make sure you've got a socket set and an oil filter socket in hand. Additionally, gather all the necessary supplies such as: There’s ongoing discussion about how frequently you should change your oil. Traditionally, it was every 3,000 miles or three months. However, Toyota recommends extending this to 5,000 miles or six months for regular oil, and up to 10,000 miles or one year for 0W-20 synthetic oil. Consistency is key, regardless of which interval you choose. Follow these steps to successfully change your oil: Finally, reset the maintenance light. To do this, turn the key to the ACC position, set the odometer to show mileage (not trip), turn off the ignition, and hold down the trip reset button. Then, turn the key back to ACC while still holding the button. The maintenance light should blink while you hold it down. Congratulations! You’ve successfully completed your oil change. For those interested in similar maintenance tips, here are some related posts: Remember, routine maintenance keeps your vehicle running smoothly and extends its lifespan. Happy tinkering! Dr Series Pressure Valves,Hydraulic Pressure Reducing Valve,Adjusting Pressure Reducing Valve,Adjustable Pressure Reducing Valve Shanghai Jinhai Hydraulic Co.,Ltd , https://www.shanghaijinhai.com
Changing the Oil in Your Corolla
 Toyota Camry Maintenance – Oil Change
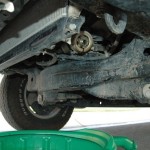 Toyota Tundra Maintenance – Change Oil and Oil Filter
 Toyota Sienna Maintenance – Replace Cabin Air Filter
 Scion tC Maintenance – Shock and Spring Replacement
 Toyota FJ Cruiser Maintenance – Replace Spark Plugs
 Toyota Tundra Maintenance – Change Brake Pads
Toyota Corolla Maintenance – Oil Change
For genuine Toyota maintenance parts, click here.